7 Days to Die: Beginner's Guide and Best PC Settings
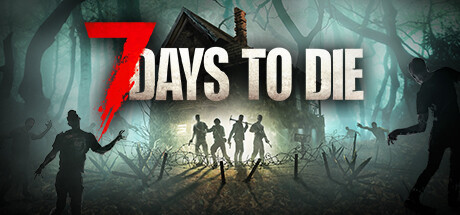
How to get through the early game in 7 Days to Die: what to do first, how to build and loot with less waste, what to lower on a weaker PC, and where trainer options make sense.
What You Are Getting Into
7 Days to Die is a first-person shooter at heart, with survival horror, tower defense and role-playing systems on top. You scavenge, mine, craft and explore, then put that work into defenses that have to hold against the undead. As you progress you will meet nearly 60 zombie archetypes, including special infected that behave and attack in their own ways. Difficulty keeps climbing, so good habits formed early pay off for a long time.
The game supports solo play, online and LAN co-op, PvP and cross-platform multiplayer. Start alone. Learning the loot, crafting and defense loops is easier when nobody is waiting on you, and a failed experiment costs only your own time. Co-op makes a good second step, since sharing a base and splitting jobs can spread the load once the threats get heavier.
- Play your first world solo so you can learn without pressure.
- Spend each quiet stretch preparing for the next fight.
- Expect zombies to get tougher the longer you survive.
Choosing Your World
You can start in Navezgane, the campaign world, or in a randomly generated one. Generated worlds include cities, towns, lakes, mountains, valleys, roads and caves, draw on over 700 unique locations, and can reach 100 square kilometers. For a first playthrough, Navezgane makes more sense. Because it is the fixed campaign map, guides and friends can point you to places that will actually be there.
Random worlds are better saved for a second or third run, when you know what a good base site looks like. Bigger maps mean longer trips, and on a PC close to the minimum spec a smaller generated size is the safer pick. There are 5 biomes, so look around before settling on a permanent location, and treat the ground near your spawn as a temporary first home.
- Start in Navezgane while you learn the systems.
- Use smaller generated maps on lower-end PCs.
- Scout nearby biomes before committing to a permanent base.
Your First Days: Priorities
Food, water, basic tools and somewhere defensible to sleep come before anything else. With nearly 50 buffs, boosts and ailments in play, hunger and injuries affect how your character performs, so deal with them early rather than letting them pile up. Craft simple tools and weapons from what you gather, and replace them once better materials or loot turn up.
Look for a Trader NPC soon after you spawn. Traders buy and sell goods and hand out quest jobs, which send you to specific locations with a reward waiting at the end. While you are still learning the map, that is a steady source of money, gear and direction. Sell loot you have no use for and spend the proceeds on whatever covers your biggest gap.
- Gather food and water before you go exploring far.
- Treat ailments right away instead of waiting.
- Use Trader quests for early money and gear.
- Sell duplicate loot rather than hoarding it.
Building and Defending a Base
The world is fully destructible and moldable, and structures obey structural stability rules. Buildings and terrain can collapse under their own weight or because of bad design. Leave the ground under your walls intact and avoid long unsupported overhangs. If a key support block is lost during an attack, a whole section can come down with it.
Add defensive layers as the base grows: traps, electric power, auto turrets, automated doors and fortified positions are all available. Plan it like tower defense. Steer attackers into choke points where traps and turrets do most of the work, and keep a fallback position for when the front line gives way. Over 1,300 building blocks and a painting system leave plenty of room for style, but make the structure sound first.
- Never dig out the blocks your walls stand on.
- Funnel attackers into one or two kill zones.
- Keep a fallback room with supplies inside the base.
- Repair damaged blocks after every fight.
Looting, Crafting and Character Growth
Loot spans 6 quality ranges and items accept mods, so two weapons of the same type can perform very differently. Compare anything you find with what you already carry, and hang on to a strong base item to mod instead of swapping it out straight away. More than 500 crafting recipes are available, and schematics unlock stronger ones, so read each schematic you pick up.
Perks sit under 5 main attributes, and more than 100 books grant extra skills. Spreading points thinly in the early game tends to leave you mediocre at everything, so pick one attribute that suits how you play and build it first. Vehicles change how you loot once you have them. You find the parts, learn the recipes and craft rides such as a bicycle, minibike or motorcycle, which make supply runs much quicker.
- Compare quality tiers before discarding gear.
- Read schematics and books as soon as you find them.
- Focus your perk points on one attribute early.
- Make a vehicle a mid-game goal to speed up looting.
Inventory After the Recent Updates
Inventory has changed a fair bit lately. V3.3.0 brought the Bigger Backpack system, which you can craft, loot or buy, along with an 8x6 grid. That makes 48 slots: 4 rows you can fill freely and 2 rows that encumber you once used. On long runs, keep heavy or low-value items out of those bottom rows so you are not slowed down at the wrong moment.
V3.4.0 put a search bar and filters on your backpack and containers, so finding ammo or medicine mid-fight no longer means scrolling. Sort base storage by item type and the filters become far more useful. The developers have set up a team for smaller updates and say bug fixes and quality-of-life changes will now come more regularly. Experimental builds are available through the Game Versions and Betas tab in the game's Steam properties.
- Leave the encumbered rows empty before heading out.
- Use the backpack search during fights for ammo and healing.
- Sort base storage by category to make the filters useful.
- Back up saves before switching to an experimental build.
PC Settings and Performance
Minimum requirements are a 2.8 GHz quad-core CPU, 8 GB of RAM, a graphics card with 2 GB of dedicated memory, DirectX 11, 64-bit Windows 10 or newer and 15 GB of storage. The recommended spec moves up to a 3.2 GHz quad-core, 12 GB of RAM and 4 GB of video memory. The developer also warns that running a dedicated server and the client on one computer doubles the RAM requirement, which leaves an 8 GB machine short if you try to host that way.
On a minimum-spec PC, take the approach that works for most large open-world games. Drop view distance first, then shadows, then texture quality, since 2 GB of video memory runs out fast. Lowering resolution or turning on scaling is the last step. A recommended-spec machine can afford higher textures and a longer view distance, which helps you see threats coming, though it is still worth keeping some performance headroom for busy fights.
- Lower view distance and shadows before anything else.
- Keep texture quality modest on 2 GB graphics cards.
- Do not host a dedicated server on the same 8 GB PC.
- Leave free space beyond 15 GB, since future releases may need more.
How the Trainer Options Fit
Keep trainer options to single-player or offline play. The game has online co-op, PvP and cross-platform multiplayer, and altering values there changes other people's games and may get you kicked by server hosts. Wallhack (ESP) and Aimbot especially should stay in your own solo worlds. Back up your save folder before enabling anything, because a world that took many hours to build is not worth losing to a bad value or a crash.
Each option lines up with a part of the game. Infinite Health, Infinite Stamina and No Hunger and Thirst remove survival upkeep, leaving you free to practice building or explore Navezgane. Infinite Ammo, No Reload and One-Hit Kills let you test trap layouts against hordes without risk. Unlimited Skill Points and XP Multiplier make it quick to try perk builds. Unlimited Money is useful at Traders, Instant Crafting speeds up base projects, and Super Speed and Game Speed cut down long trips.
- Back up saves before enabling any option.
- Never use the trainer in co-op, PvP or on public servers.
- Use Unlimited Skill Points in a test world to plan builds.
- Turn options off one at a time if a save starts acting oddly.
FAQ
Can I run 7 Days to Die with 8 GB of RAM?
Yes. 8 GB is the listed minimum and 12 GB is recommended. Avoid running a dedicated server on the same machine, since the developer notes that doubles the RAM requirement.
Should I start in Navezgane or a random world?
Start in Navezgane. As the fixed campaign map, it is easier to learn and to find help for. Random worlds, which draw on over 700 locations, suit later runs.
How do I get more inventory space?
Since V3.3.0 you can craft, loot or buy a bigger backpack. The inventory is now an 8x6 grid with 4 rows of free slots and 2 rows that encumber you.
Can I use the trainer in co-op or PvP?
No. Use it only in single-player or offline worlds, and back up your saves first.
How do I try experimental updates?
Right-click the game in Steam, open Properties, go to the Game Versions and Betas tab and pick latest_experimental from the drop-down. Back up your saves before switching.
Comments
No comments yet
Be the first to share your thoughts.